Set up ChatGPT with Microsoft Azure

Azure OpenAI Service is a cloud-based service that provides access to full ChatGPT functionality. Azure OpenAI Service is a paid service, but it offers a pay-as-you-go pricing model, so you only pay for what you use. It also provides a free trial with a $200 credit for the first 30 days. For more information, see the pricing page.
Currently, you must submit an application to access Azure OpenAI Service. To apply for access, complete this form. It generally takes about one business day to receive access after submitting the form.
Setting up ChatGPT via Azure OpenAI Service consists of the following steps:
- Set up an Azure resource.
- Configure access to the Azure resource from Unity.
Let’s go through these steps in detail.
Set up Azure resource
First, you need to create a resource and deploy a model in Azure. This is a one-time process that takes a few minutes. After that, you can use ChatGPT in any AI Toolbox project.
Follow the instructions in Create and deploy an Azure OpenAI Service resource to comlete this step.
Configure access to Azure from Unity
Now you need to set up access to Azure from the Unity Editor.
Get Key, Region and Endpoint of the Azure resource
You can find them on the Keys and endpoint page in Azure dashboard.
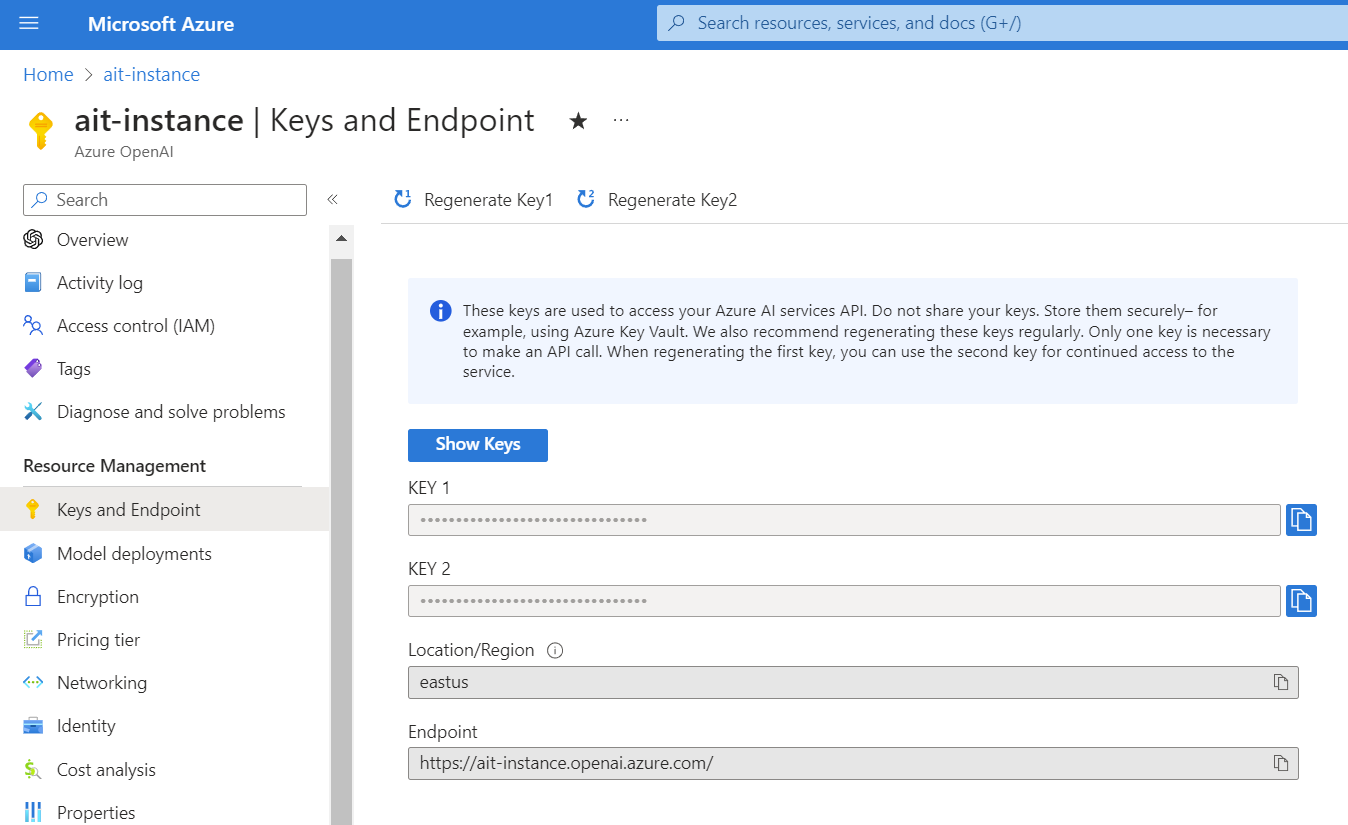
Keys and Endpoint page in Azure dashboard
Get the Deployment name of the model
You can find it on the Deployments page in Azure OpenAI Studio

Azure deployments page in Azure OpenAI Studio
Paste values in Unity Project Settings
In your Unity project, navigate to Project Settings > AI Toolbox and paste the API Key, Endpoint, and Deployment Name into the corresponding fields in the Azure ChatGPT section.

Azure configuration in Unity Project Settings
Done! You can now use ChatGPT via Azure OpenAI Service in your Unity project to generate scripts, explain code, chat with your AI assistant, etc. To use Azure, simply select it in the Chatbot dropdown in the code generation window or the chat window.
Comments