Getting Started
Once you set up AI Toolbox, you can start using it to generate and edit C# scripts, generate images, shaders and UI documents for your Unity projects.
Generating Scripts
To generate a script with ChatGPT, Gemini, Ollama, Claude etc, you’ll need to open the prompt window. There are two ways to do this:
- In the Unity Editor, select a GameObject and click the “Generate Component” button in the Inspector.
- Type a prompt describing the C# script you would like the AI to generate.
- Click “Generate”, and the script will be automatically created.
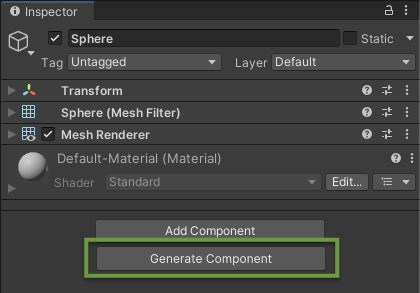
Press Generate Component button to open the prompt box
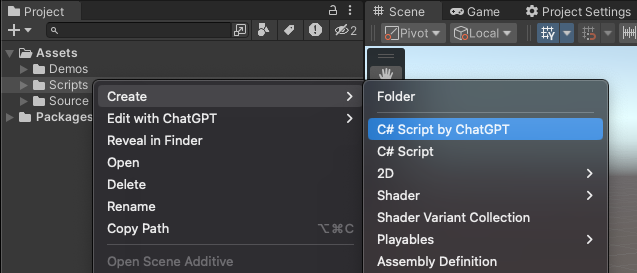
Alternatively, to open this window you can right-click in the Project tab ▶︎ select Create ▶︎ click C# Script by ChatGPT or use the shortcut: Alt+Shift+S (Windows) or Option+Shift+S (Mac).
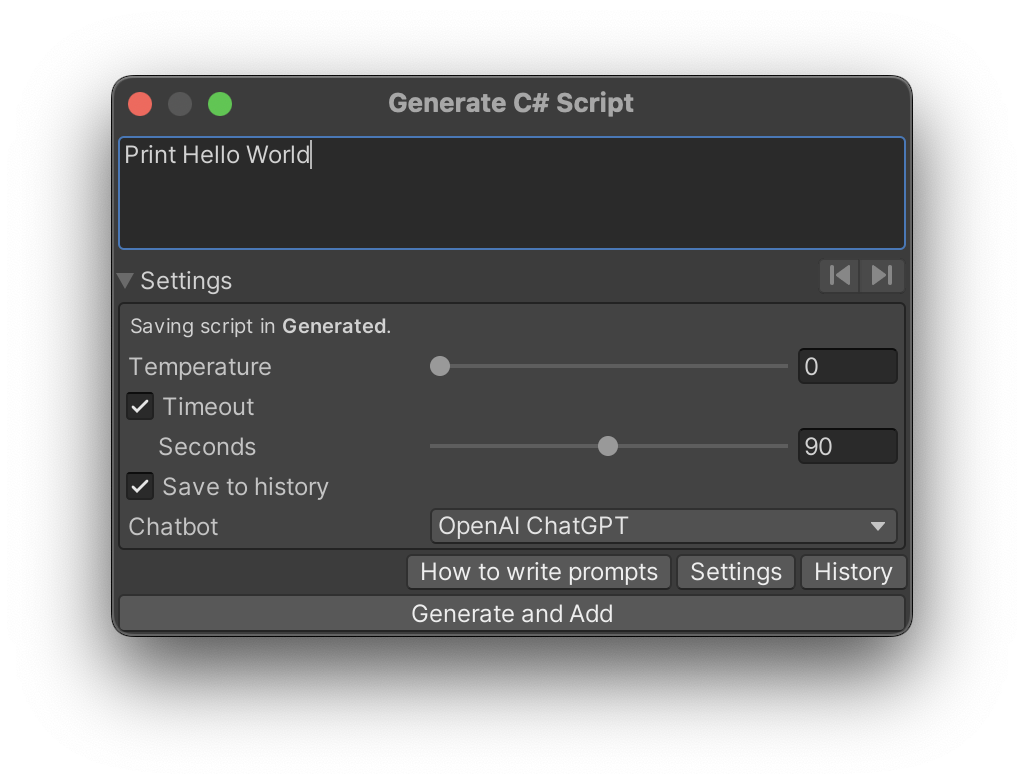
Type your request in the prompt window and click “Generate and Add” to start the script generation process. You can also use Ctrl+Enter (Windows) or Cmd+Return (Mac). The generated script will be added to your project (by default in Assets/Generated, but you can choose the destination in the Output Path field in the General Settings).

The prompt window
-
Advanced Options — if expanded, reveals the Temperature, Timeout, History parameters, How To Write Prompts button , mirrored from the Settings panel (which can be found in Edit ▶︎ Project Settings ▶︎ AI Toolbox).
-
Save to History — enable this option to save the generated script to the history. History can be accessed with the “History” button in this window or in the Settings panel.
-
Chatbot - the menu for choosing the Backend for generating the scripts. Currently, there are two options: OpenAI ChatGPT, Azure ChatGPT and Google Gemini. The default chatbot is OpenAI ChatGPT. The Backend used for Chat with AI can be changed in Chat with AI window’s Settings.
The prompt window with advanced options expanded
Editing Scripts
If you would like to change any script (either AI-generated or human-written), click the “three dots button” on the script on the Inspector panel and select Edit Script with ChatGPT. This will open the prompt window. To enable or disable auto-accepting of the edits, please go to the General Settings and check the Auto-accept edits checkbox.
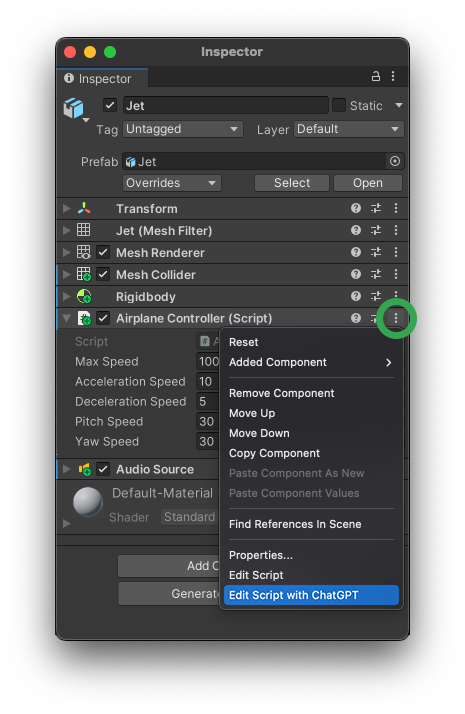
Edit a script (method 1, from the Inspector panel)
Alternatively, you can select this scipt in the Project tab ▶︎ right-click on it ▶︎ select Edit C# Script with ChatGPT. This will open the prompt window.
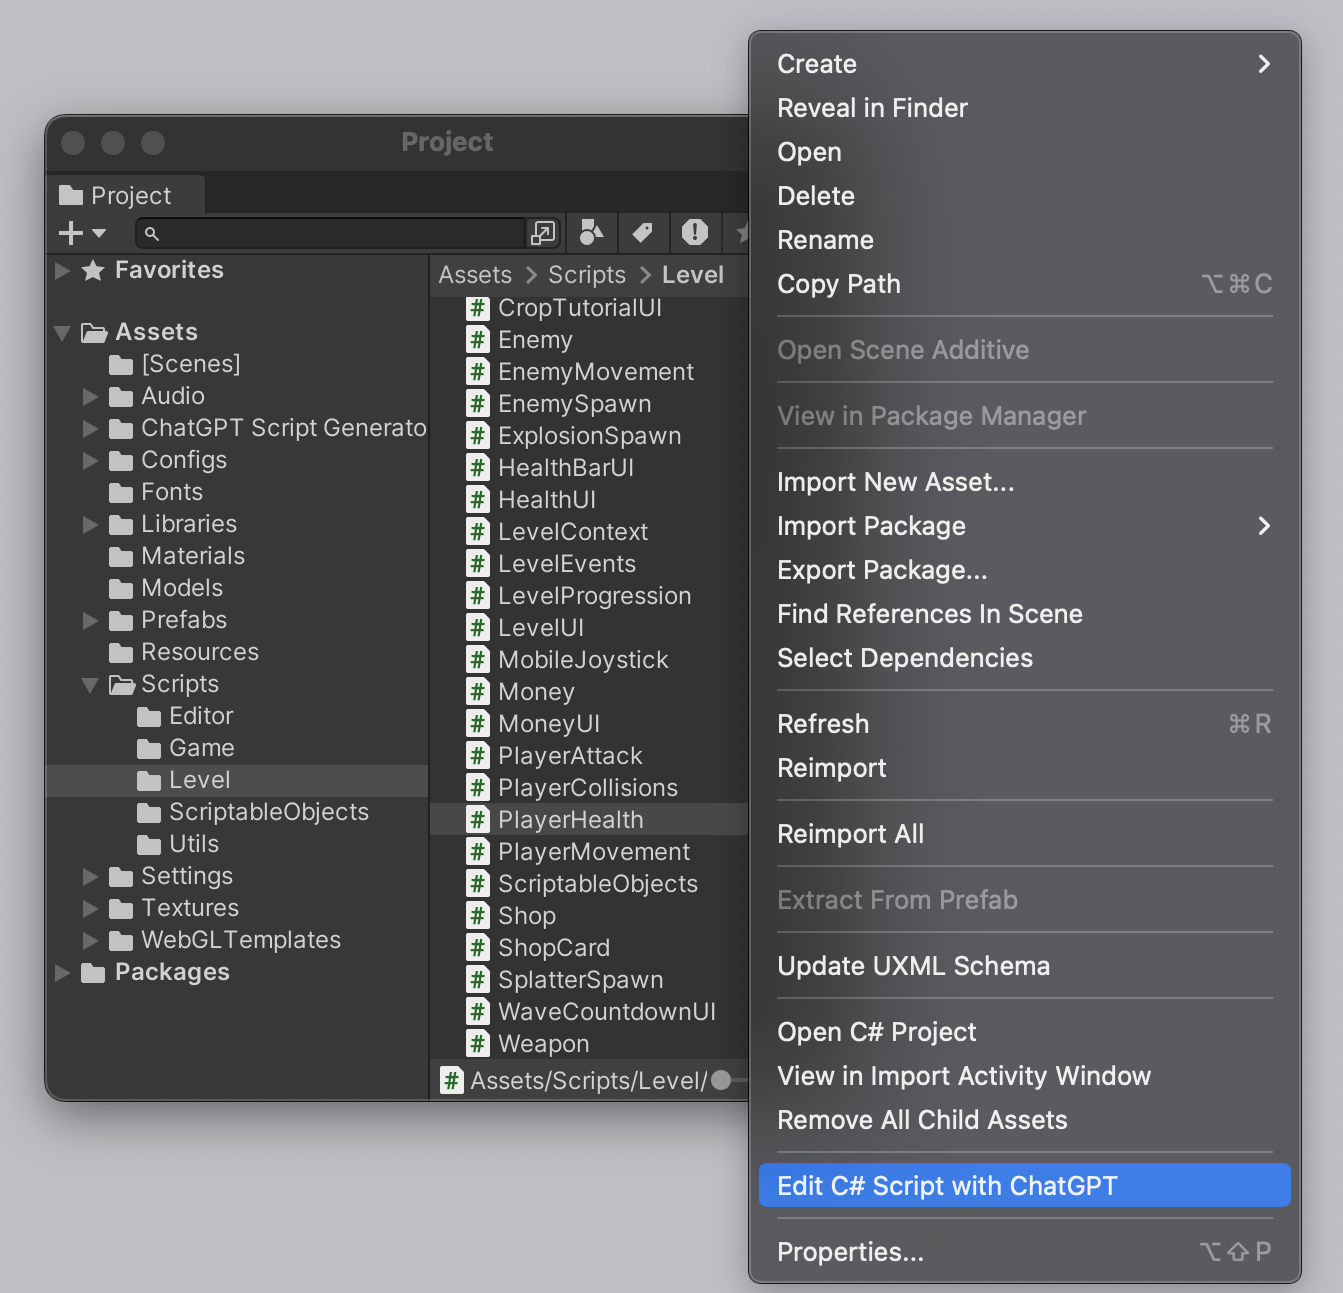
Edit a script (method 2, from the Project tab)
Once the prompt window is open, you can edit the script and click Generate to start the generation process. You can also use Ctrl+Enter (Windows) or Cmd+Return (Mac).
-
Left/Right Arrow Buttons — view the previous and next prompts from History.
-
Advanced Options — if expanded, reveals the Temperature, Timeout, History parameters, How To Write Prompts button , mirrored from the Settings panel (which can be found in Edit ▶︎ Project Settings ▶︎ AI Toolbox).
-
Save to History — Enable this option to save the generated script to the history. History can be accessed with the “History” button in this window or in the Settings panel.
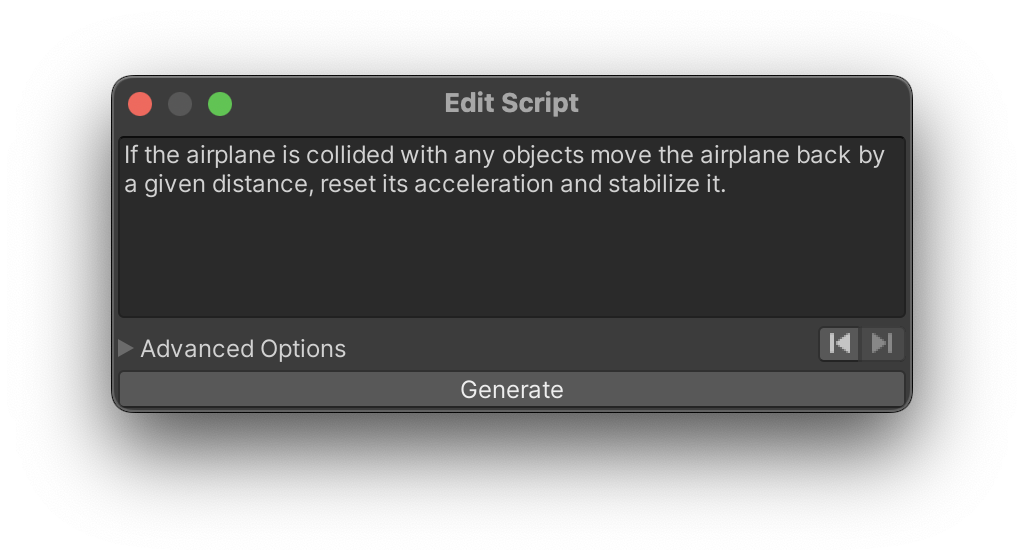
The Edit Script prompt window
AI Toolbox looks whether the generation is going successfully or it is going to have potential errors. If the script generation went without errors, by default you will have a new script in your project (by default, in Assets/Generated, but you can choose the destination in the Output Path field in the General Settings).
If you have the Auto-accept option turned off, you’ll be presented with an according window in the end each generation process. To change this option, go to the General Settings and check the Auto-accept new files checkbox.
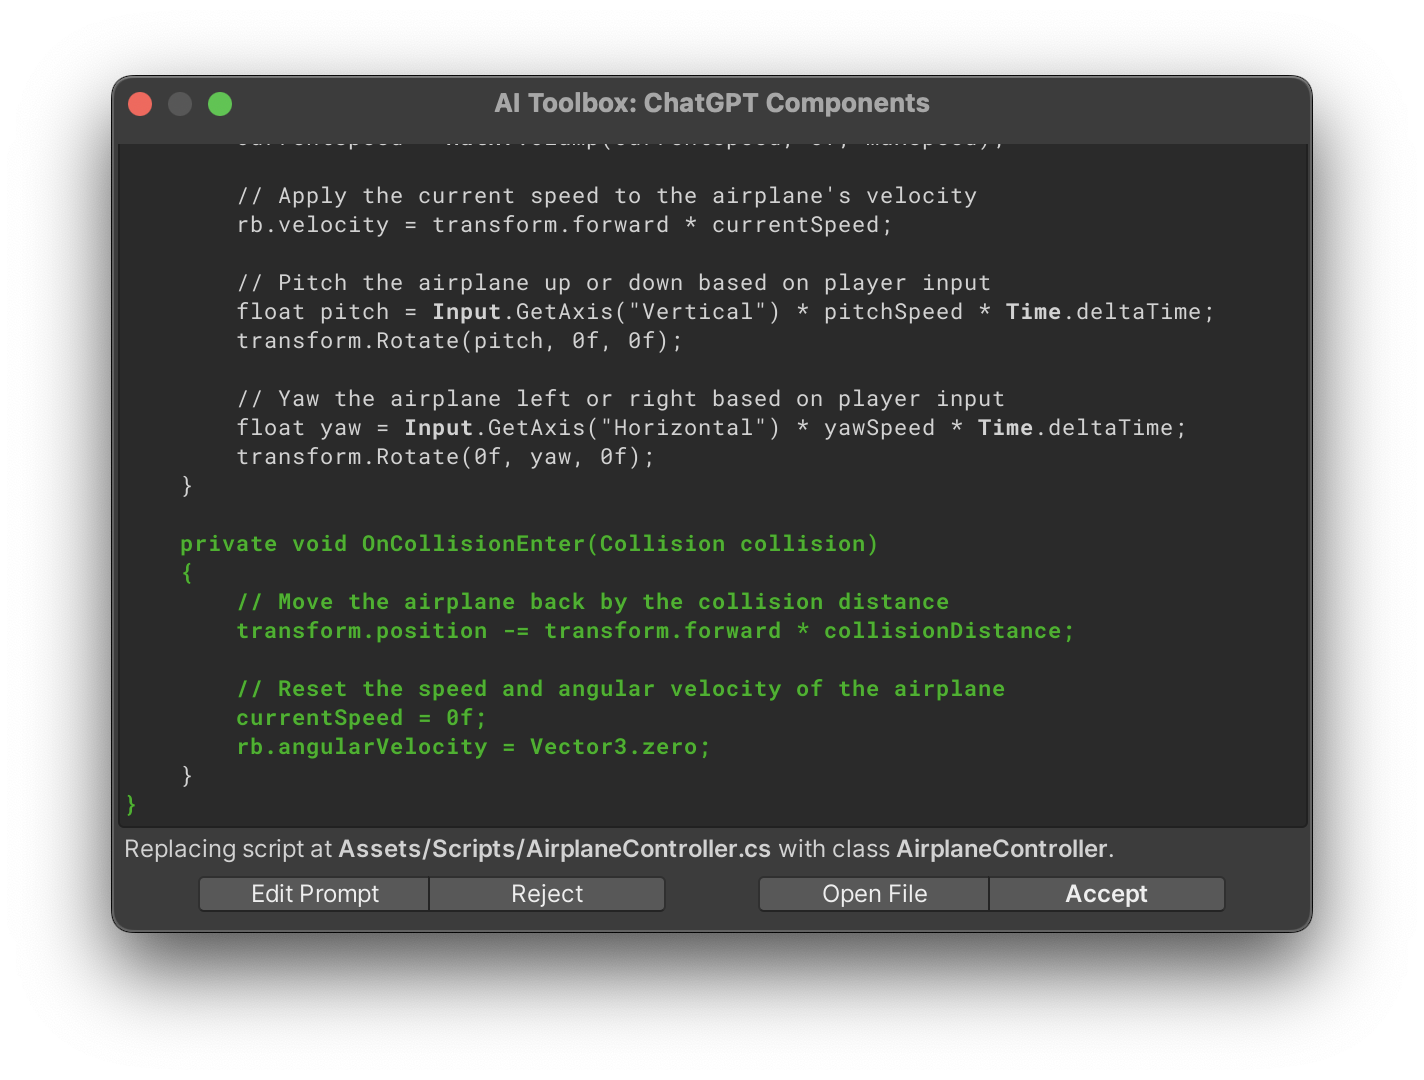
The window showing the successfully completed script generation (Auto-accept option is ‘off’)
- Edit Prompt - This will open the prompt window containing the prompt text that was used to generate the script.
- Reject - This will discard the changes made by editing the script.
- Open File - This will open the script file in the default text editor.
- Accept - This will accept the changes to the script.
If Editing the Script Results in Errors
AI Toolbox sees if the code that is being generated has errors and does not compile. AI Toolbox will give a few options to address that. If you have any errors when the script is generated, the look of the script generation window will change to the following:
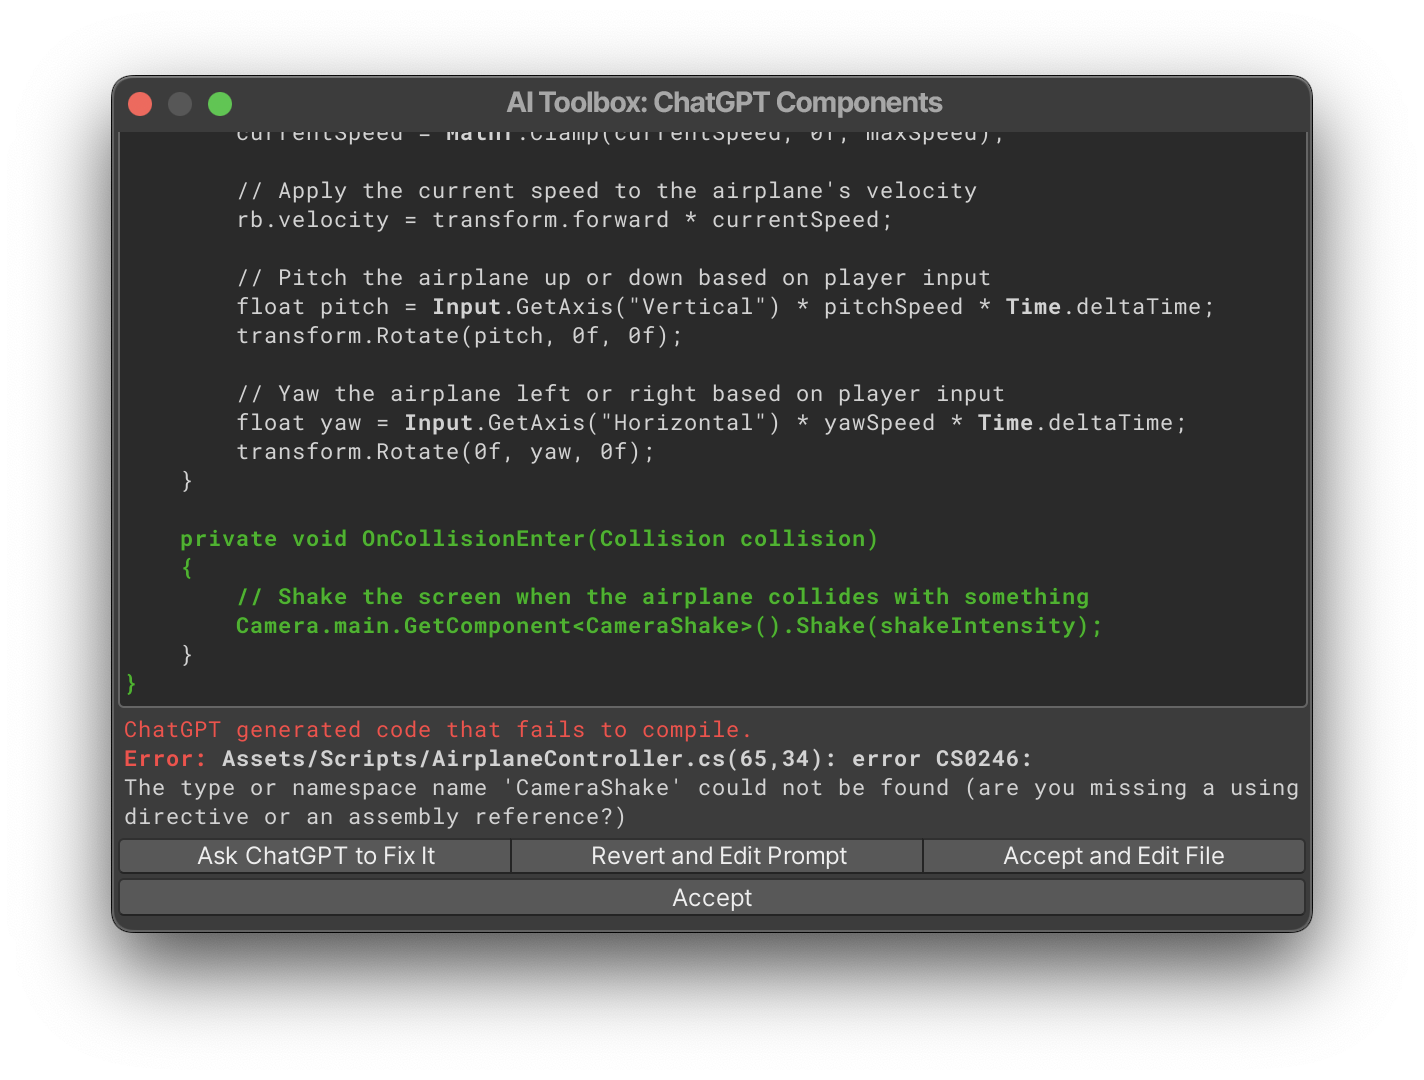
Generation window with errors
- Ask ChatGPT to Fix It - This will submit the current code along with the error description and will ask AI to fix the code.
- Revert and Edit Prompt - This will discard the changes made by editing the script.
- Accept and Edit File - This will accept the changes and will open the script file to be edited manually. This option is useful if you want to fix the error yourself.
- Accept - This will accept the changes as is and save the script.
Generating Images with DALL•E
AI Toolbox can generate images using the DALL•E. You only need to write a text description of the image you want it to produce. The prompt can be as simple as “A brick wall texture” or as complex as “A futuristic retro space ship landing on a snow-covered planet”. The more complex the prompt, the more specific the image will be.
To open the DALL•E generation propmt window, right-click anywhere in the Project tab and select Create ▶︎ Texture by DALL•E.
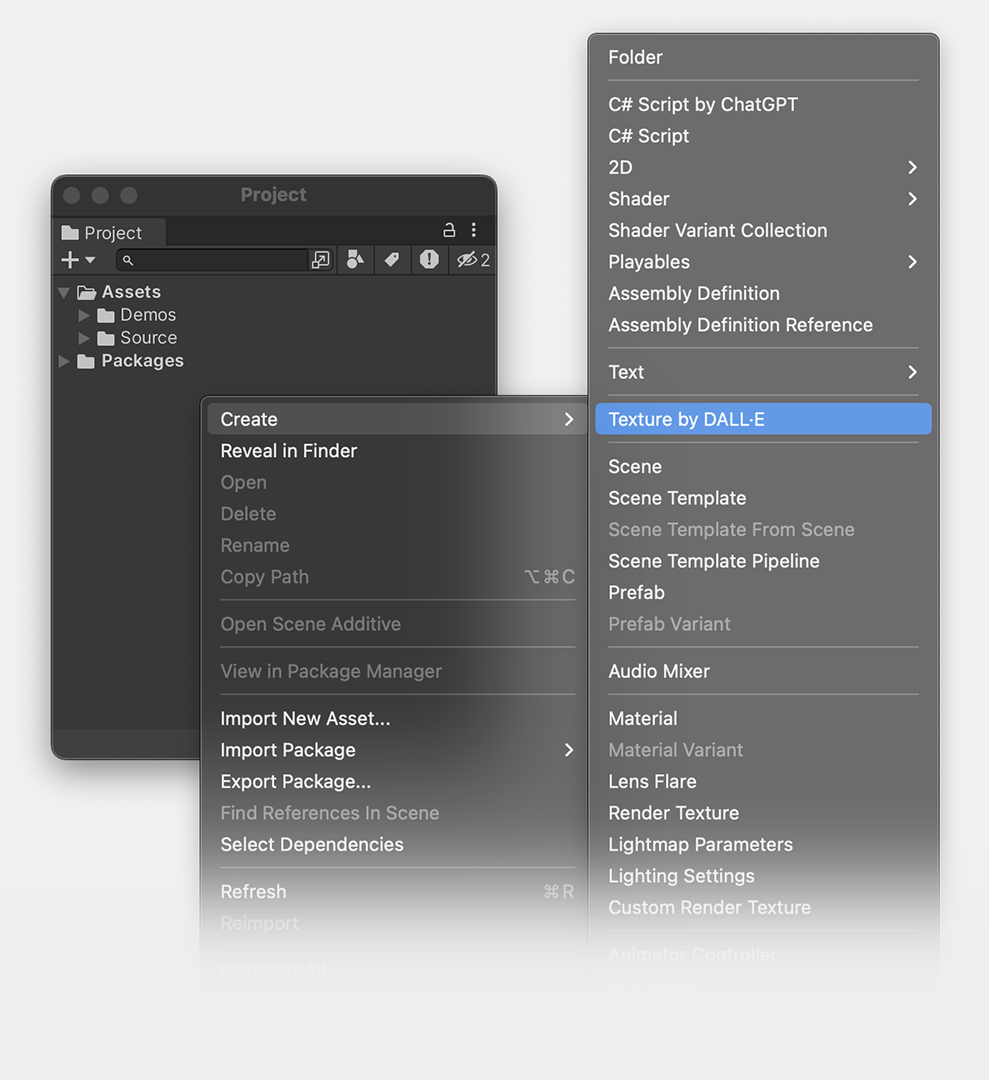
‘Generate texture by DALL•E’ menu item
You’ll need to type your prompt in the prompt field and click Generate to start the generation process. You can also use Ctrl+Enter (Windows) or Cmd+Return (Mac).
- Resolution - Opens a drop down menu where you can select the resolution of the image to be generated. The options are: 256x256 px, 512x512 px, 1024x1024 px. These are all resolutions that DALL•E currently supports.
- Tileable - Generates a texture that can be seamlessly tiled.
- Seam Size - The size of the seam if Tileable generating is enabled. The default value is 0.05.
- Left/Right Arrow Buttons — view the previous and next prompts from History.
- Advanced Options — if expanded, reveals the Timeout, Save to History parameters, Settings button and How To Write Prompts, and History buttons, mirrored from the Settings panel (which can be found in Edit ▶︎ Project Settings ▶︎ AI Toolbox).
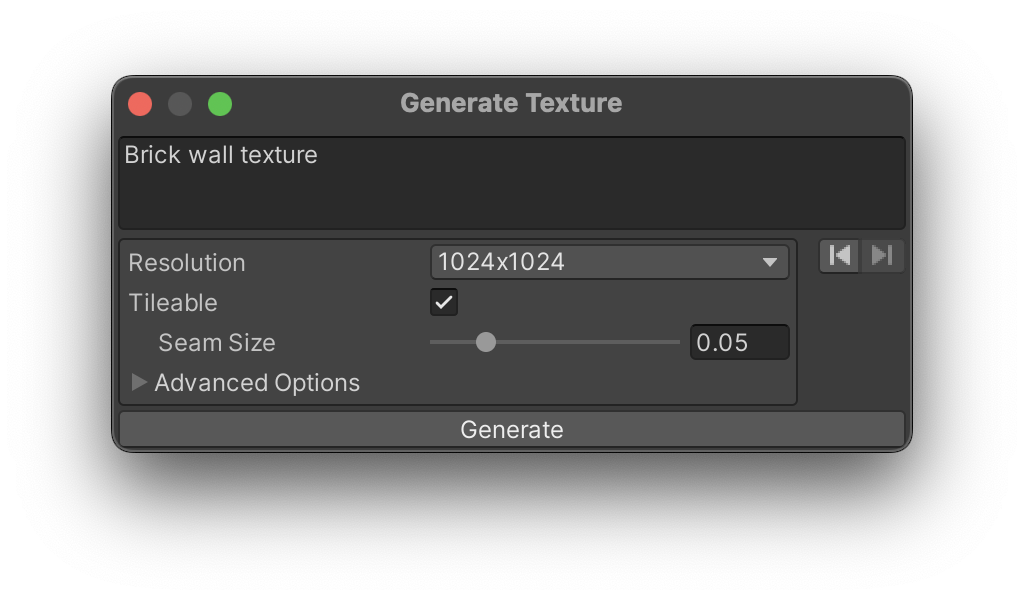
DALL•E prompt window
When the generation is completed the following menu will appear:
- Prompt field - This is the field where you can edit the prompt.
- Save and Regenerate - This will save the generated image to the folder set in Output Path (by default, it is
Assets/Generated) and will generate another image without closing this window. - Discard and Regenerate - This will discard the generated image and will generate another image without closing this window.
- Done - This will close the window and will save the generated image to the folder set in Output Path (by default, it is
Assets/Generated).
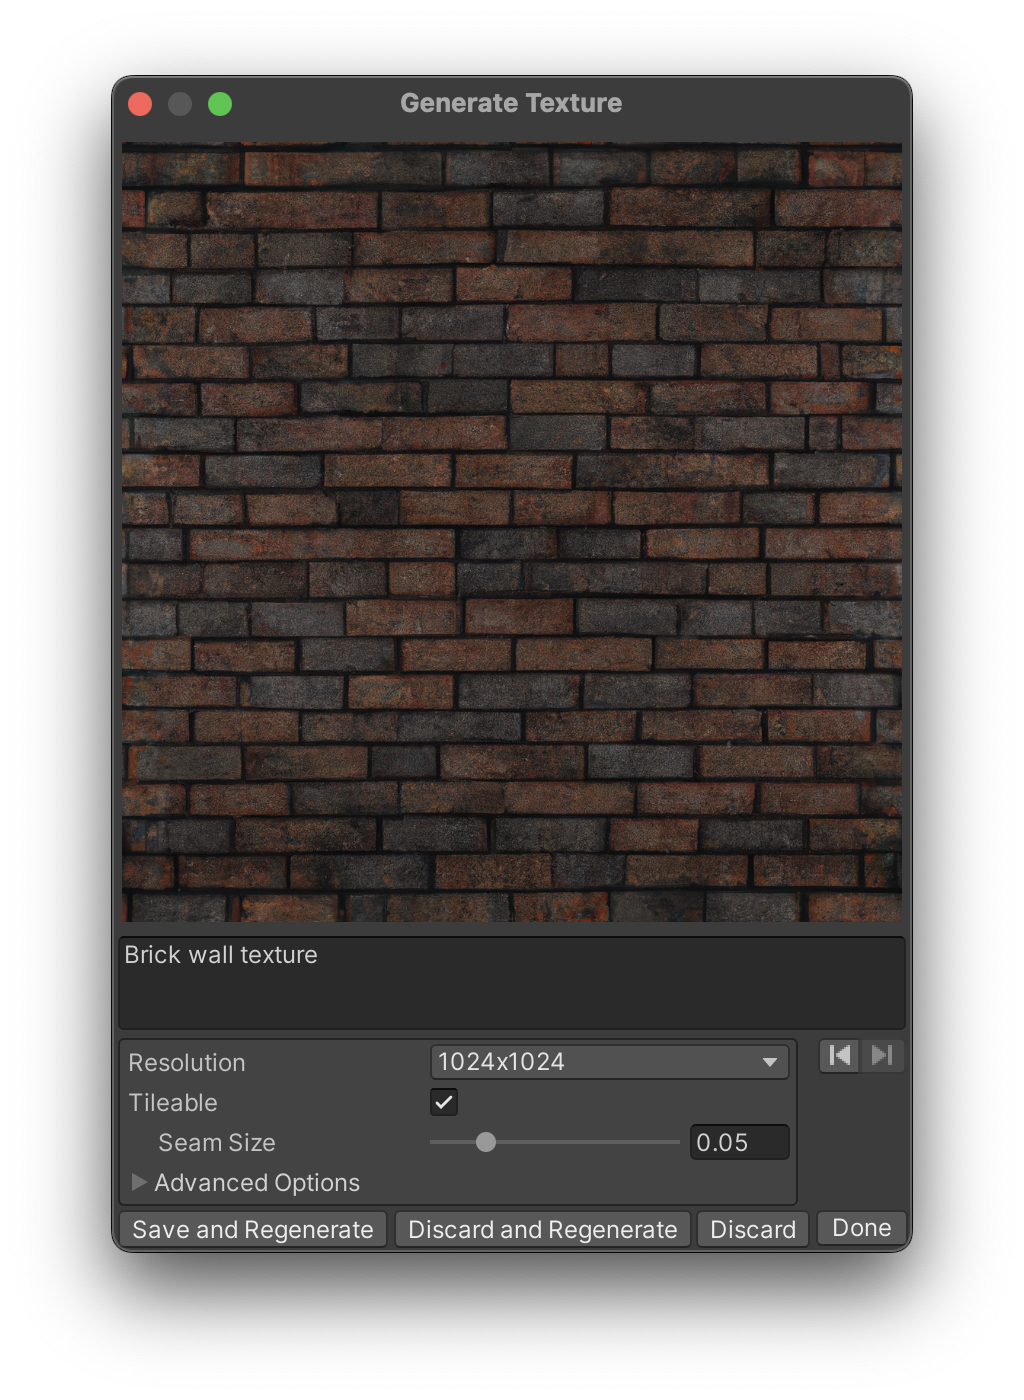
Generated texture window
Generating Shaders
You can generate shaders with AI Toolbox. To do that, you need to have a prompt that contains the text description of the shader you want to generate.
We’ve found that the best way to have successful results is to generate a very simple shader and then gradually add more complexity using the Follow-up button, which appears upon every generation process completion (described below in this paragraph), or you can use the Edit Shader feature.
Please note that the outcome of the generation process completely depends on the AI model’s code writing abilities.
To open the shader generation propmt window, right-click anywhere in the Project tab (or click + there) and select Create ▶︎ Shader ▶︎ ChatGPT. Alternatively, you can go to Window ▶︎ AI Toolbox ▶︎ Generate Shader.
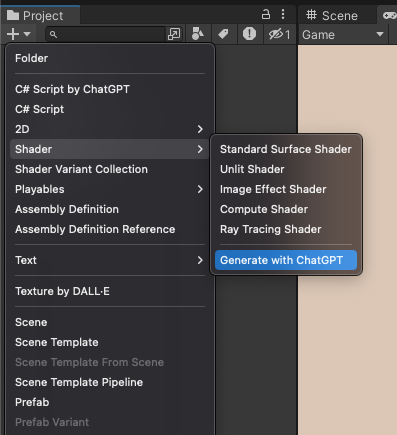
Shader generate menu item, method 1
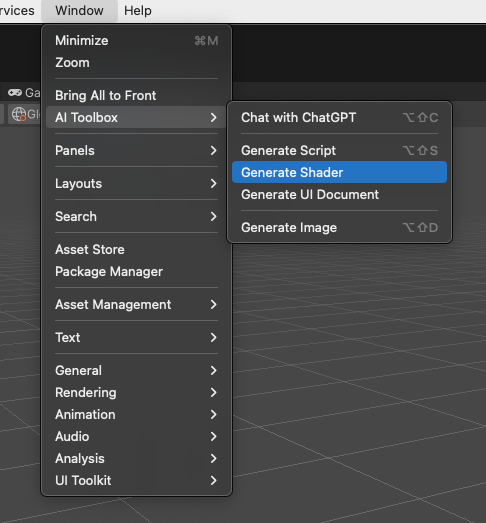
Shader generate menu item, method 2
Once you have your prompt, click Generate to start the generation process. You can also use Ctrl+Enter (Windows) or Cmd+Return (Mac).
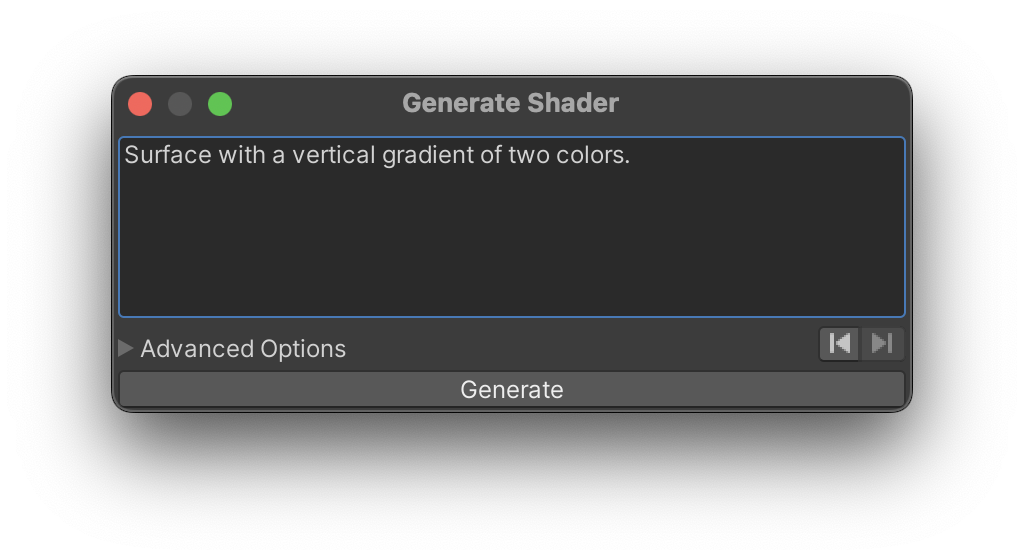
Shader generation prompt window
When the generation process is completed, a menu will appear with the following options:
- Edit Prompt - This won’t save the shader and will open the prompt window where you can edit the prompt to make another generation attempt. Shortcut:
Backspace. - Reject - This will reject the generated shader and will close the window. Shortcut:
Esc. - Follow-up - Iterate with ChatGPT on the generated code.
- Open File - This will open the generated shader file in the default application for the file type. Shortcut:
Ctrl+Enter/Cmd+Return. - Accept - This will save the generated shader and will close the window. Shortcut:
Enter.
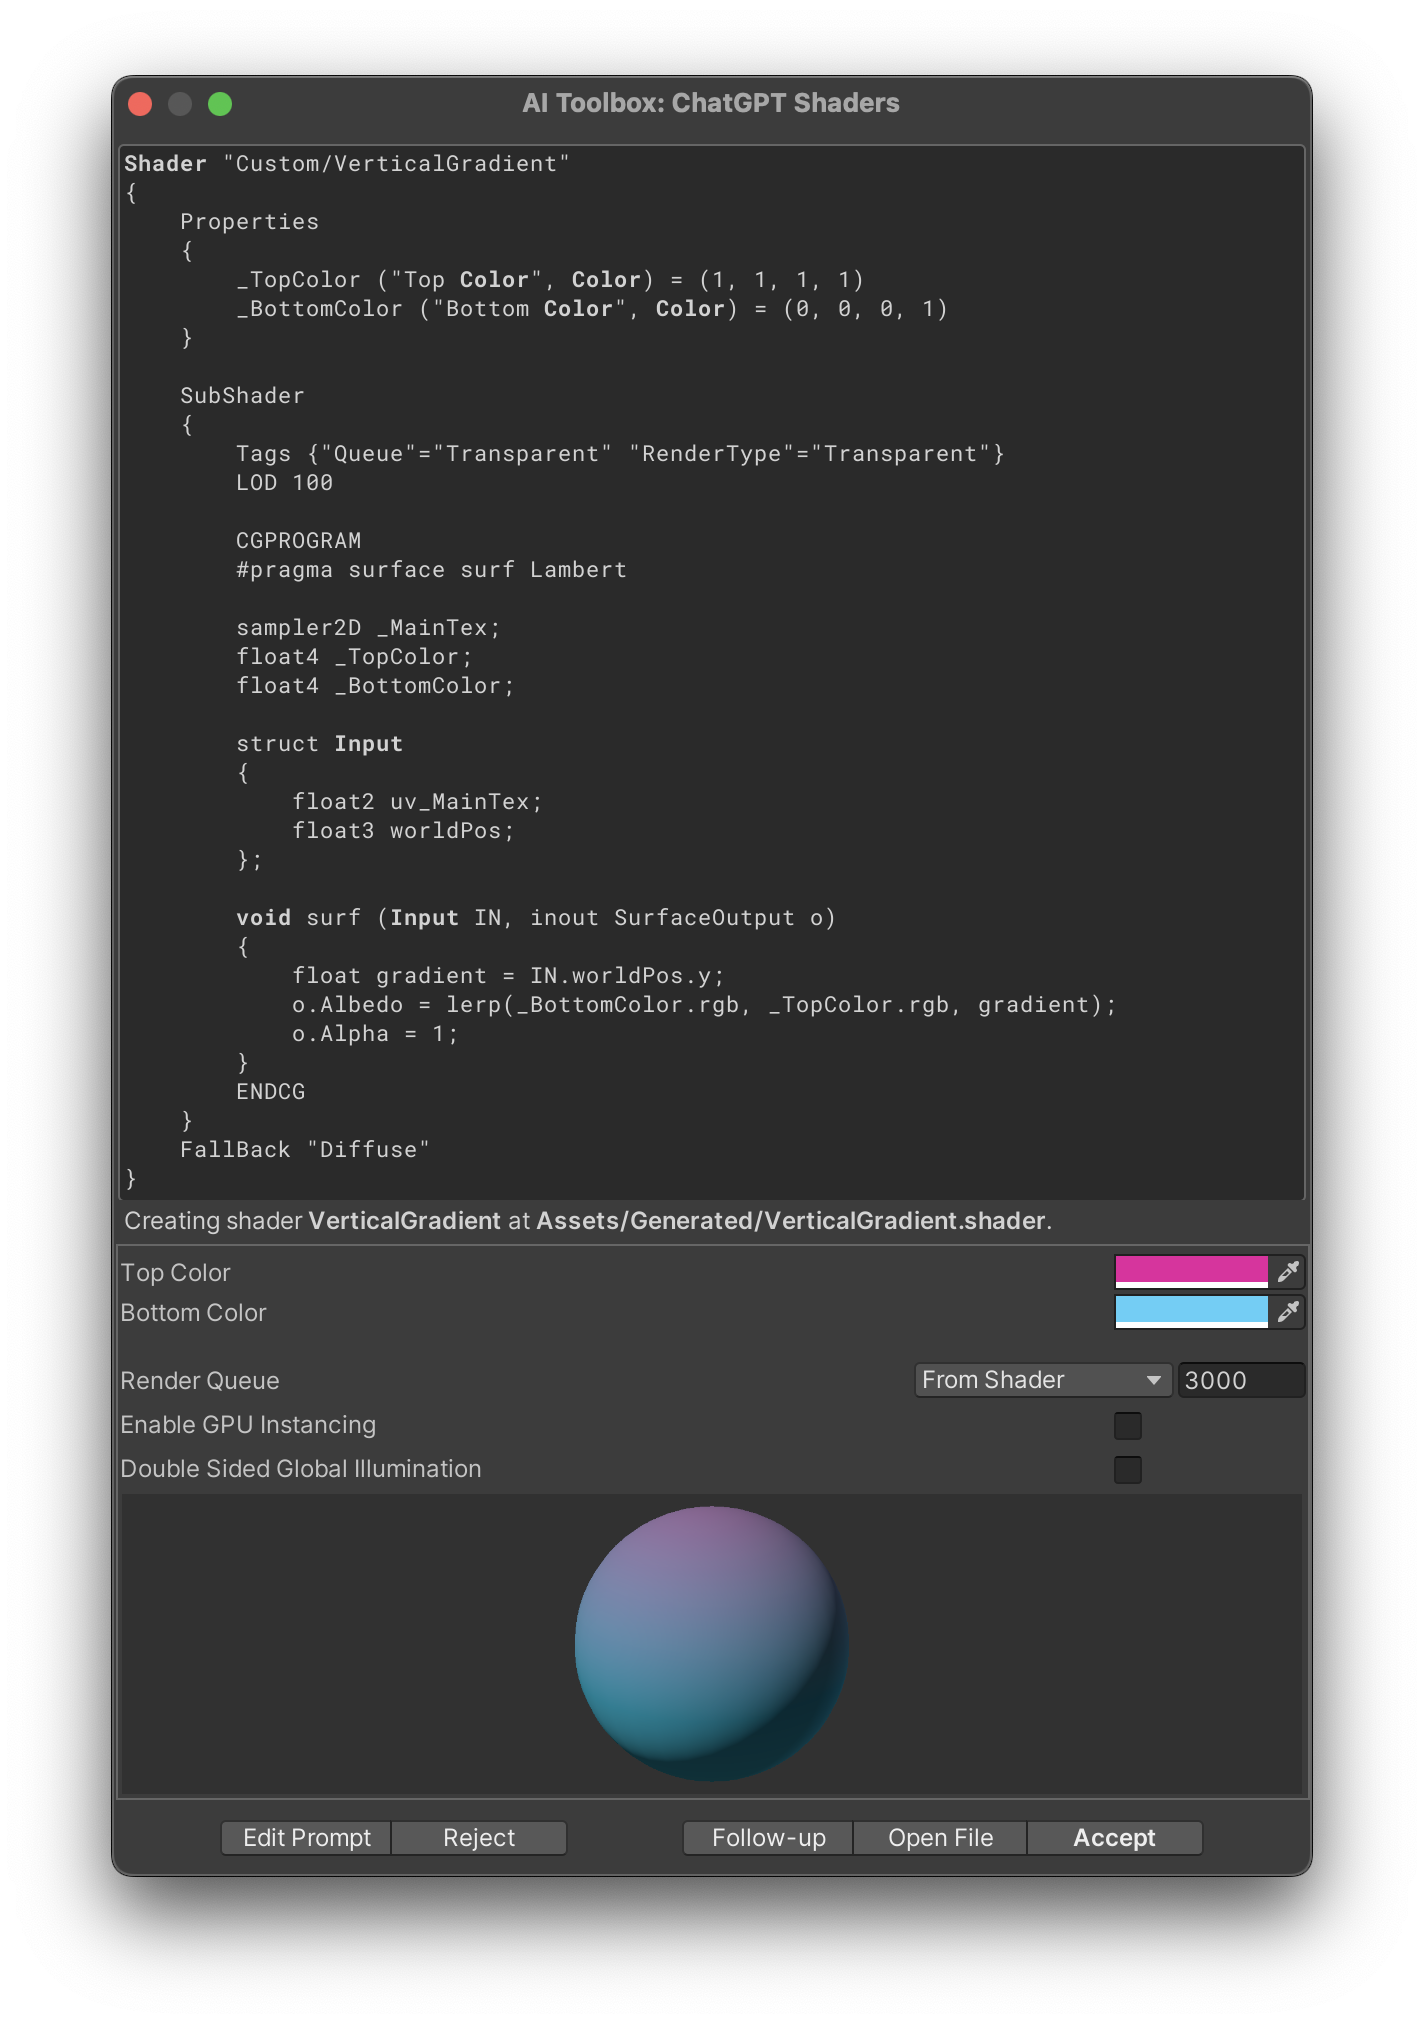
The menu after the shader generation
Editing Shaders
With AI Toolbox, you can edit shaders with ChatGPT. To do that, you need to select a shader file, on the Inspector panel you should see the Edit Shader with ChatGPT button.
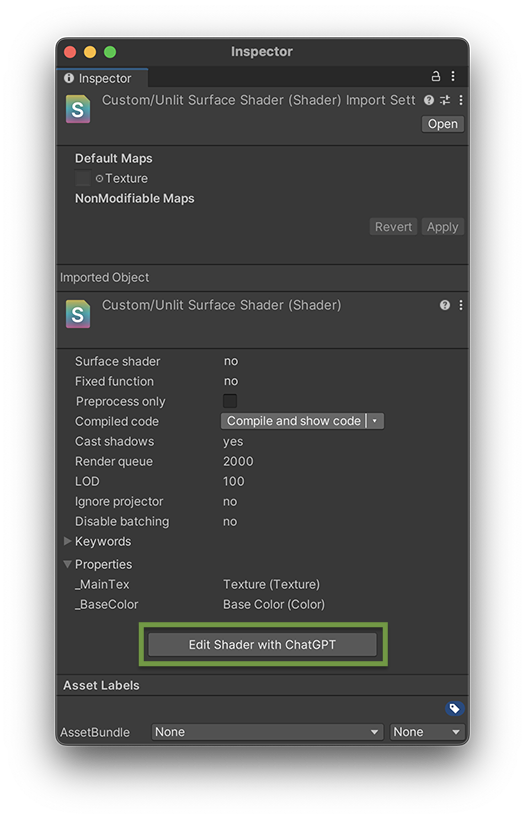
Edit Shader with ChatGPT button
ChatGPT will edit both human-written and generated shaders.
AI Toolbox Settings
All settings can be found in Edit ▶︎ Project Settings ▶︎ AI Toolbox.
OpenAI API Key
- API Key is the field where you will need to paste your API Key, once it is generated (here is more info on API Key generation).
⚠️ The API key is stored in the following file: UserSettings/AiToolbox.asset. When sharing your project with others, be sure to exclude the “UserSettings” directory to prevent unauthorized use of your API key. Even though the API key is encrypted, any client-only security measure can be circumvented.

OpenAI ChatGPT API Key and other settings
- Model is the GPT model that will be used to generate scripts. The list of the models is constantly updated with the new models as they are released and the old ones are deprecated. Please note that your account must have access to the model you are expecting to see in this list.
- Model version — the version of the model to use. This list is constantly updated with the new versions as they are released. More on Models here
- Extended context Uses a variant of gpt-3.5-turbo that can work with much longer code. It allows 4 times more context, handling up to 20 pages of text/code in a single request. However, it costs twice as much: $0.003 per 1K input tokens and $0.004 per 1K output tokens.
Microsoft Azure
You can access ChatGPT using Microsoft Azure. It provides the same models as OpenAI, but has more control over the backend. Plus, it’s also very cheap and has a one month free trial. The detailed step-by-step guide on the Microsoft Azure setup is here.
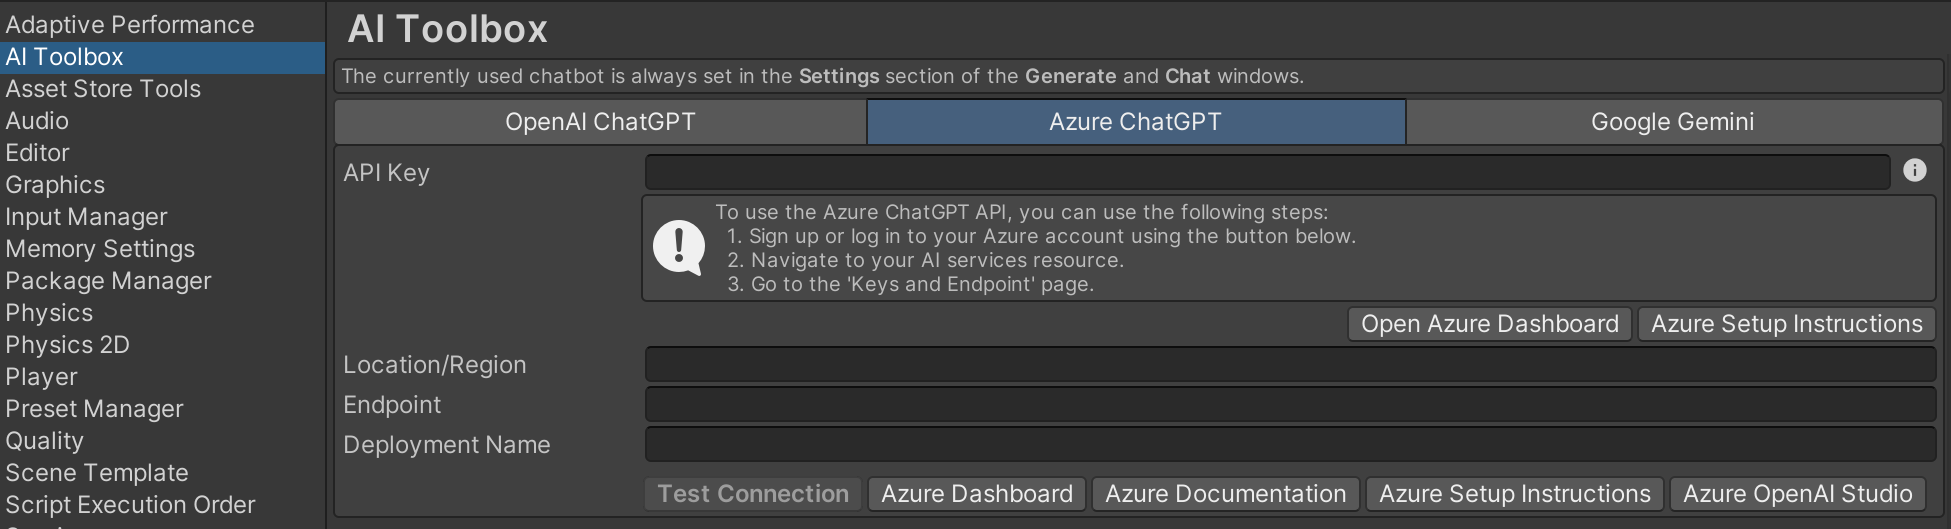
Azure ChatGPT API Key and other settings
Google Gemini
You can use Google Gemini AI model to generate scripts and chat with AI usin this GPT. The detailed step-by-step guide on the Google Gemini setup is here.
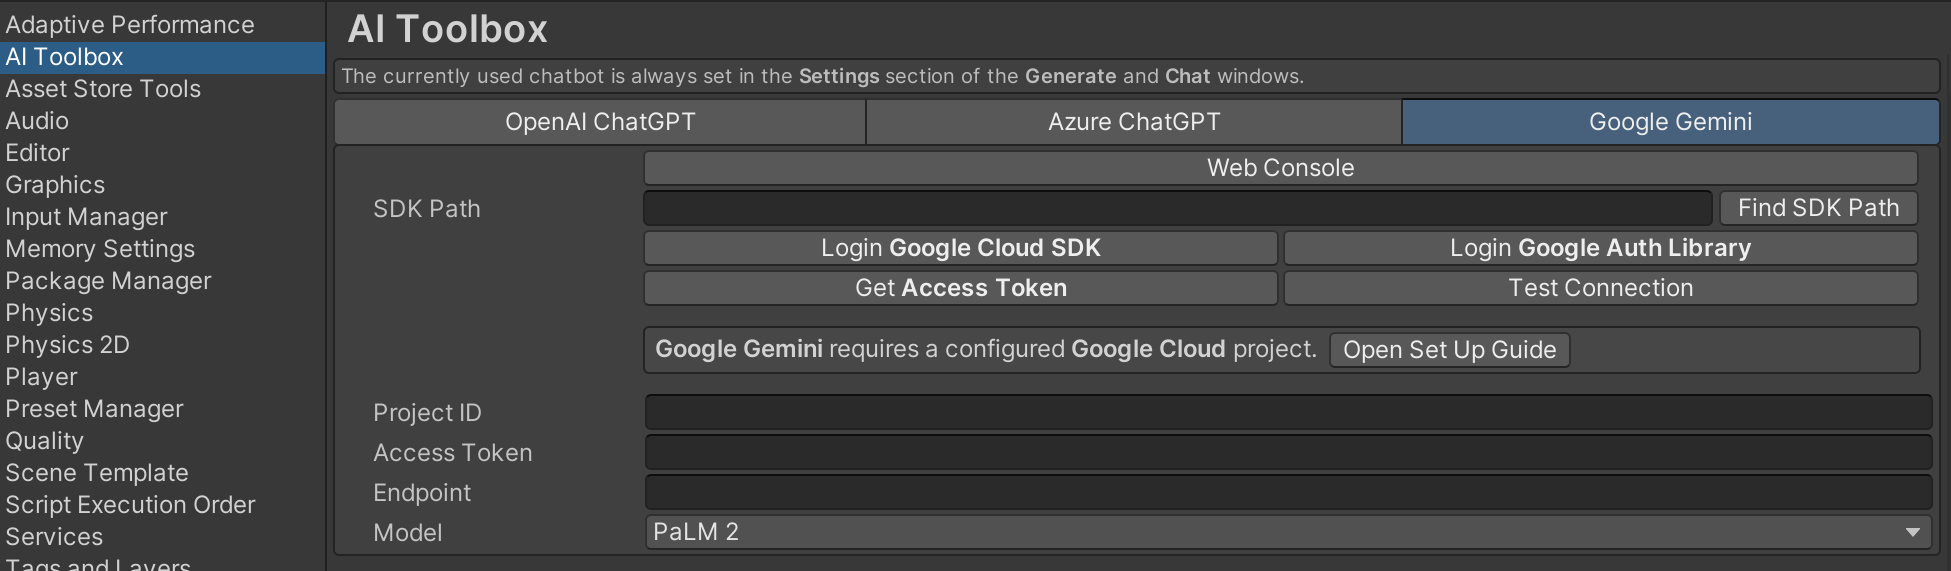
Gemini API Key and other settings
Ollama
You can set up Ollama here to be able to use its various models in the generation and chat processes. The detailed step-by-step guide on the Ollama setup is here.
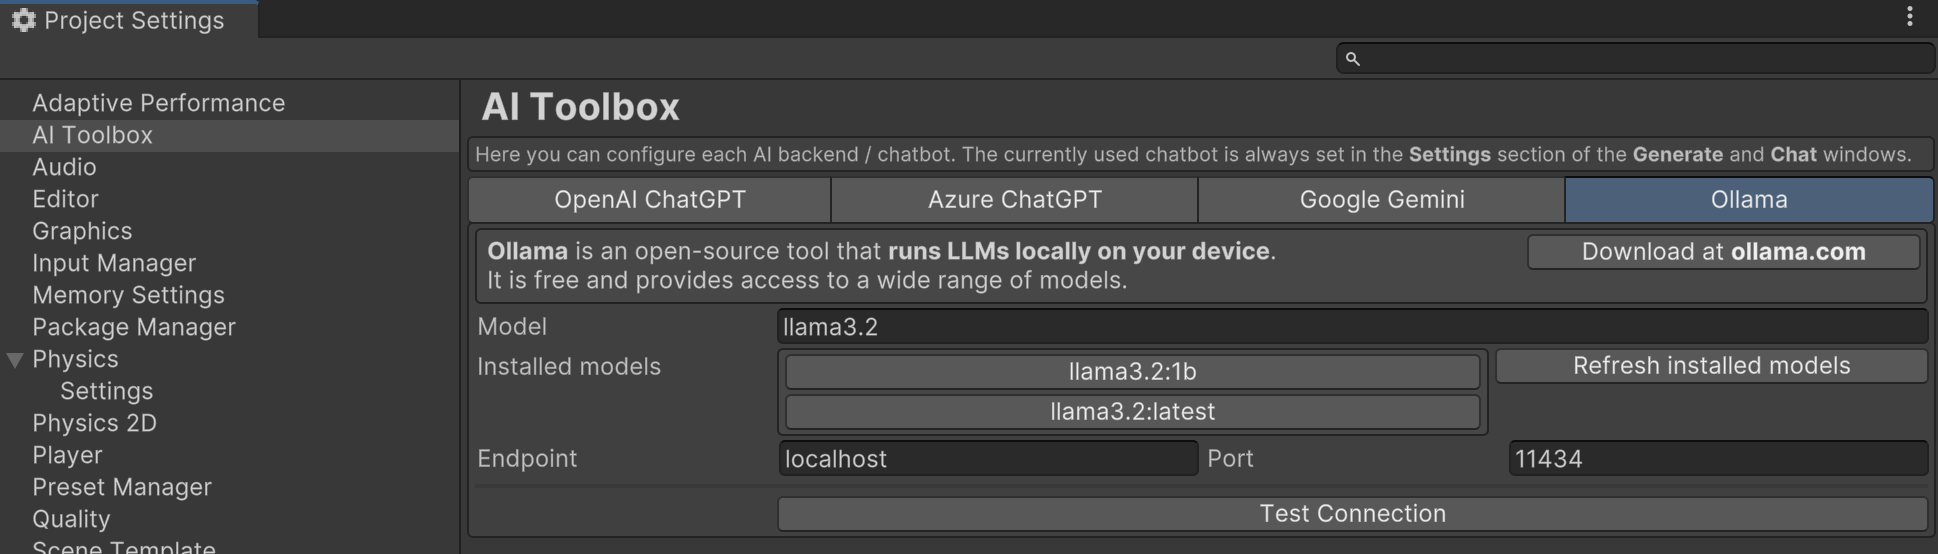
Ollama set up settings
Anthropic Claude
You can set up Anthropic Claude here for code generating and chatting with it in the Chat with AI window. The set-up guide can be found here.
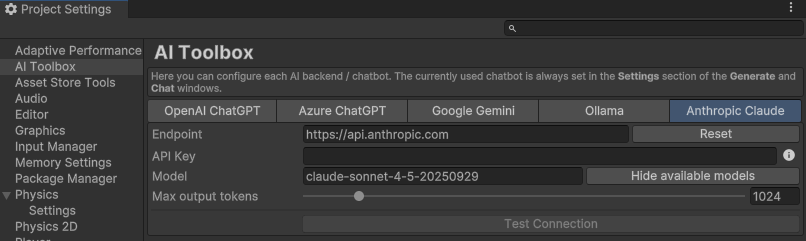
Claude set up settings
Generation Settings
- Default temperature controls randomness: higher Temperature results in more random completions. As the Temperature approaches zero, the model will become deterministic and repetitive. Lower the Temperature to get more or less the same results when you re-iterate script generation. Raise the Temperature to get more diverse, creative and surprising results upon each completion. Current default Temperature is 0.

Temperature parameter
Guiding Prompts
Guiding Prompts are used to help the model produce results that are more relevant to your project. All guiding prompts are submitted to AI along with every prompt you type in the prompt window.
- Result Type - this is the drop down menu where you can recall the predefined guiding prompts for different types of generated files (scripts, shaders, UI documents and textures).
- + and Trash Bin buttons add and remove guiding prompts.
- Checkboxes enable or disable guiding prompts without deleting them.
- Reset to default resets the guiding prompts to the default values.
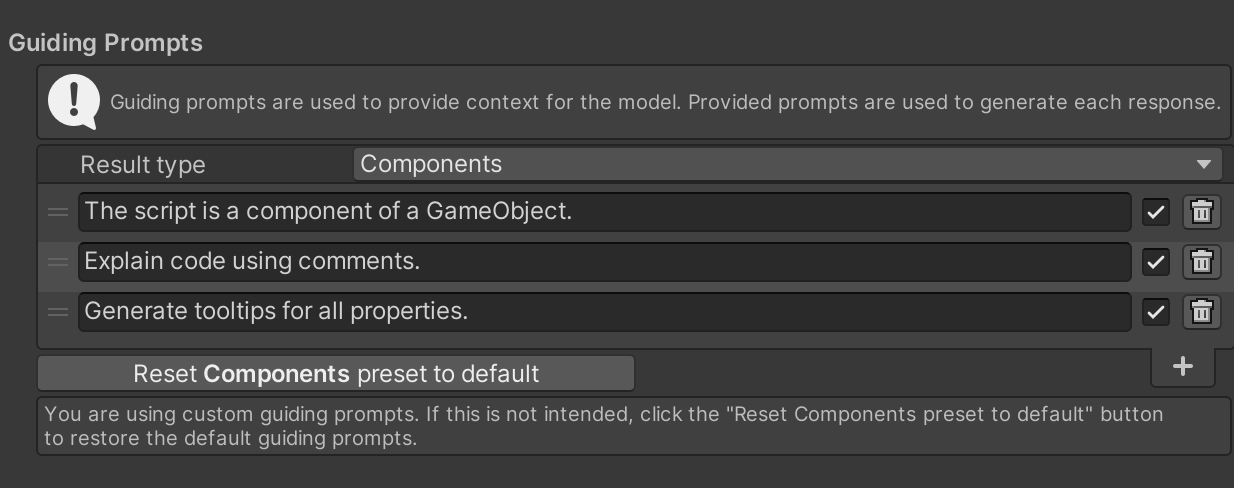
Guiding Prompts settings
The Result type drop down menu contains the guiding prompts currently used for Components (scripts), Shaders, UI Documents and Textures.
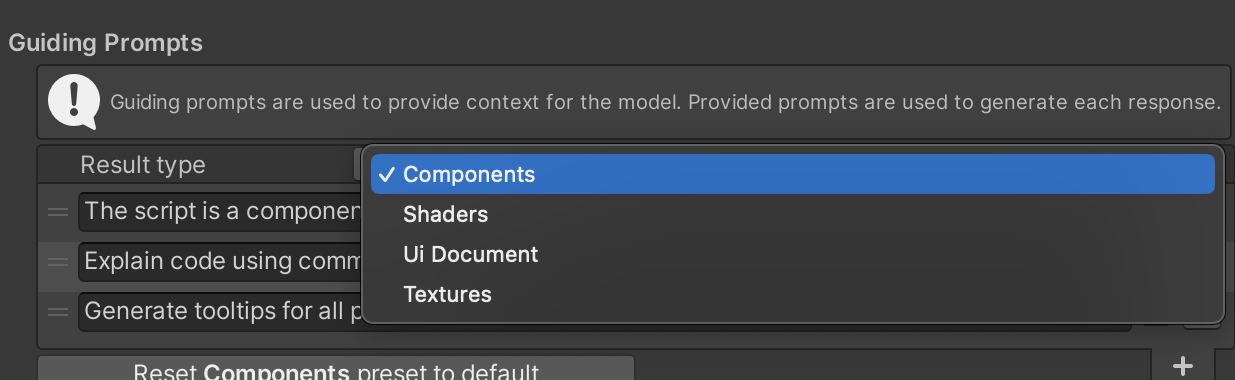
Guiding Prompts Result types drop down menu
General Settings
- Timeout - if enabled, the Duration field appears. If AI doesn’t respond within the Duration parameter of the Timeout, generation fails. Try increasing this value if ChatGPT or Gemini often outputs a ‘timeout’ error. If that does not resolve it, please take a look at this paragraph. If disabled, the generation process will wait for a response from AI indefinitely.
- Duration - is the time in seconds that AI Toolbox will wait for a response from ChatGPT or Gemini.
- Output Path - is the path where generated files will be saved when you use the “Generate Component” button in Inspector. By default, it is set to
Assets/Generated. - Inspector button - if enabled, the “Generate Component” button appears on every Game Object’s Inspector panel.
- Auto-accept new files - if enabled, AI Toolbox will automatically save generated scripts into the Unity project. If disabled, script generation window will stay open and you will be able to choose a further action with the script.
- Auto-accept edits - if enabled, AI Toolbox will automatically save script edits to the edited file. If disabled, script editing window will stay open and you will be able to choose a further action with the script. More info about these actions can be found here.
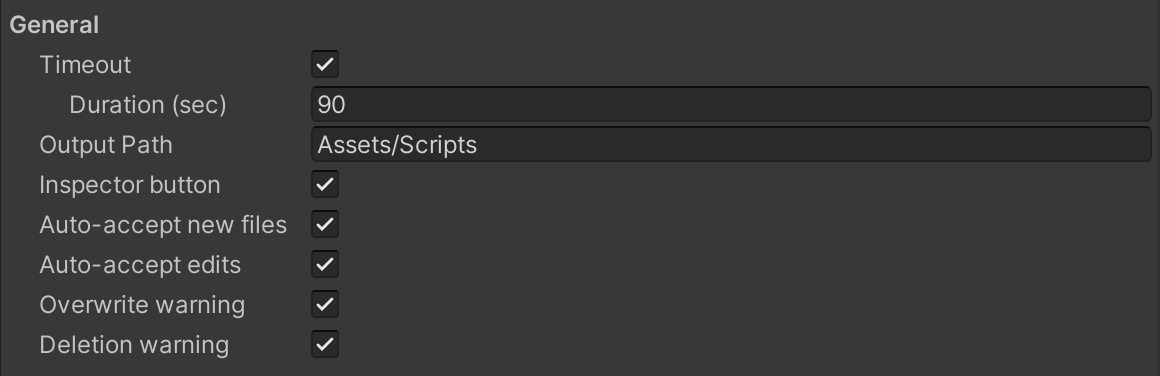
General settings
Prompt History
- View History shows the history of the prompts you have used to generate assets as well as the settings used for each prompt.
- Guiding Prompts foldout - expands/collapses the set of guiding prompts used in the generation from that particular prompt.
- Delete - deletes the prompt from the history.
- Copy - copies the prompt to the clipboard.
- Clear History - clears the history.

History settings
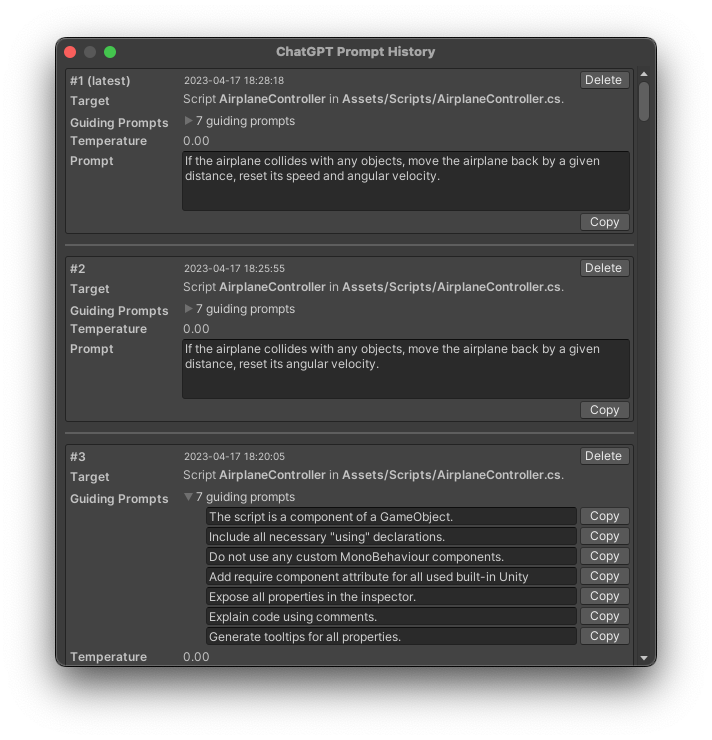
Prompt History window
Useful Links
- How to write prompts opens the How to write prompts page of this documentation in your browser.
- Discord opens AI Toolbox support Discord channel in your browser.
- Asset Store Page opens the AI Toolbox Asset Store page in your browser.

Useful Links
Troubleshooting
Please check the FAQs page, where the most common issues and their solutions are described. If you still have questions, please contact us.
Comments